The arrival of winter coincides with the biggest shopping season of the year, and during this season everyone has an eye out for places to save money. Wouldn’t it frustrate you to find out that your heating bill was sky high because you had warm air leaking out from your doors and windows all winter?
If your home is not well insulated and warm air is escaping, you are likely throwing hard earned money out the window.
According to Cornell University, “Air leakage due to cracks and openings in walls, ceilings, and floors and around doors can account for as much as 30% of a home’s heating cost.” That’s a lot of wasted money and energy! Fortunately, there’s a cost effective solution. You can easily reduce your heating bill with weatherstripping.
Finding Air Leaks in Your Home
Weatherstripping is a simple, cheap way to reduce drafts in your home and bring down your energy bill. It involves creating a tight seal in the spaces between your doors, windows, and their respective frames.
The easiest way to find out if your home has air leaks is to check your windows and doors on a windy day. If you feel cold air coming in—voila! You have an air leak on your hands.
If the day isn’t windy enough for your experiment, there’s another method you can try. You just need a blow dryer and another person to help you. Stand outside your home, and direct the air from the blow dryer towards the suspected leak. If your neighbors give you funny looks, calmly tell them you’re taking the first steps towards making your home warmer and more cost-efficient. Meanwhile, your experiment partner should be standing inside, letting you know if the air from the dryer is coming through.
Weatherstripping Your Home
If you do these tests and discover that you have an air leak, you could hire a company to weatherstrip your home. Keep in the mind, however, that weatherstripping for one door in your home can cost you $80 to $150, if a professional installs it. The whole point of this enterprise was to save money, right? Why hire someone to provide a service that you could do all by yourself?
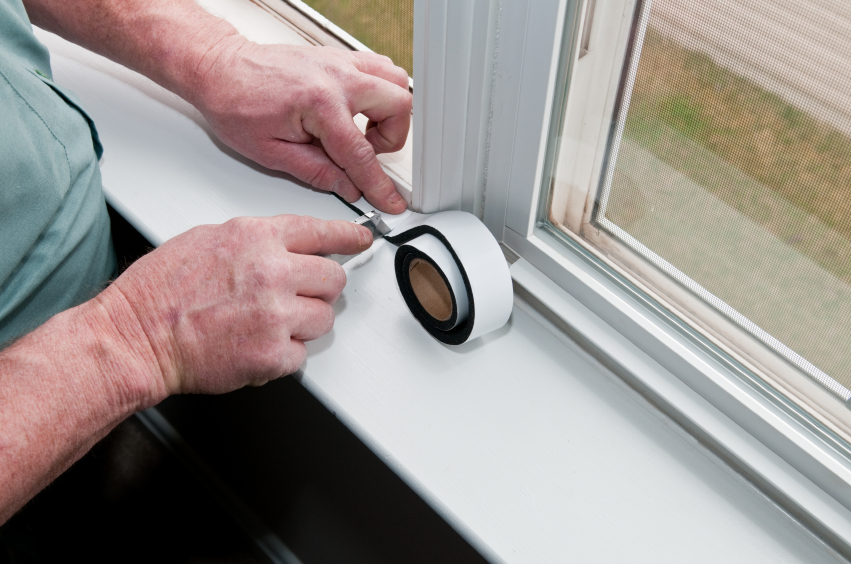
First, you’ll need to go to the hardware store to pick up weatherstripping material. There are several types that vary in terms of cost, durability and ease of installation. Foam tape is the least expensive option. It’s the most commonly used material for do-it-yourself weatherstripping because it’s incredibly easy to install and very cheap to buy. To determine how much tape you’ll need, add the measurements of all the perimeters of all the doors and windows that you’ll be weatherstripping. Factor in about 5 – 10% in extra length in case you make any errors in your calculations.
Make sure the surfaces you’re weatherstripping are dry, clean and above 20 degrees Fahrenheit in temperature. Measure twice before you cut, and apply the tape snugly against both surfaces – window/door and frame. When the window or door is closed, the material should compress to create an air-tight seal.
Once your home is properly weatherstripped, you should see a drastic reduction in your heating bill. In addition to financial savings, you’ll also be using less energy and reducing your carbon footprint, which is better for the Earth.


